These are THE BEST no spread sugar cookies. 7 basic ingredients, ready in 30 minutes and no chilling required! Just ultra thick, smooth, soft, classic cookies that can be customized for any event by using your favorite cookie-cutters.

These no spread sugar cookies have been my go-to cutout cookie recipe for years. No funny ingredients, no chill time, etc. Just a simple, straightforward, amazingly delicious, soft - yet still fully cooked cut-out sugar cookie that turns out perfectly every single time.
Serve these easy sugar cookies fresh out of the oven, decorate them with a piping bag, dip them in royal icing or even create PYO cookies using this step-by-step guide. This recipe works perfectly with all shapes and sizes of cookie cutters.
Everyone needs a classic no spread sugar cookie recipe in their repertoire, and this is mine.
Jump to:
Ingredients

- butter - use unsalted, room temperature butter
- powdered sugar - interchangeable with confectioners's sugar; they are 2 different names for the same product
- egg - room temperature, large egg
- vanilla - use pure vanilla extract, not imitation
- flour - all purpose flour, measure by weight using a scale
- baking powder - ensures a soft pillowy cookie by helping the dough to rise
- salt - regular table salt is recommended, salt enhances and balances the sweet flavors of the cookie
** see recipe card for quantities.
Instructions

Step 1: Get prepared. Heat the oven to 375 degrees. Line baking sheets with parchment paper or a silicone mat. Ensure butter and eggs are at room temperature. Butter should dent when pushed, but should not be so warm that fingers can sink into it.
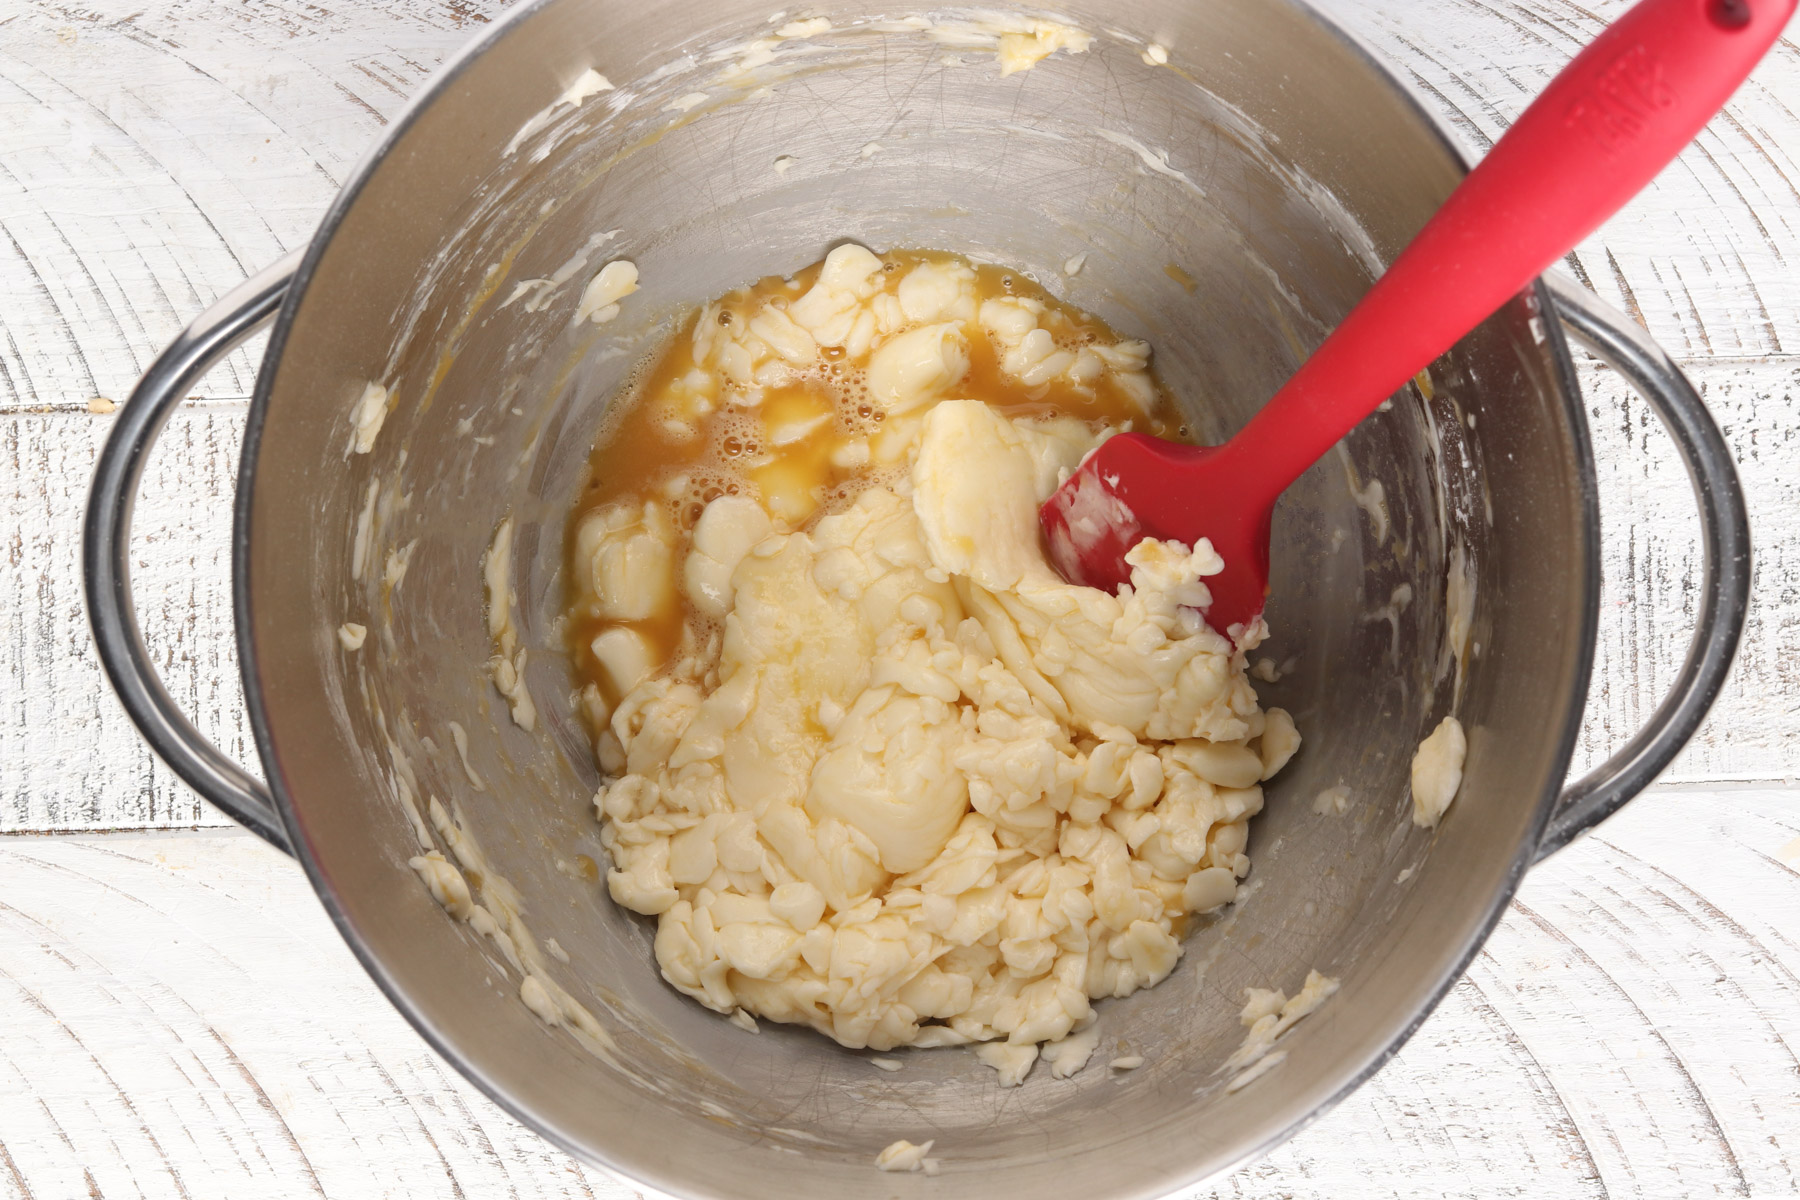
Step 2: Mix the wet ingredients. In the bowl of a stand mixer fitted with a paddle attachment, add butter and powdered sugar. Mix until fluffy and light, about 2 minutes. Stop mixer and add egg and vanilla. Mix until incorporated. It will be chunky, that's ok!

Step 3: Mix dry ingredients. In medium mixing bowl, combine flour, baking powder and salt. Whisk well. Add the flour mixture to the wet ingredients. Mix at medium speed until just combined. Avoid over-mixing.
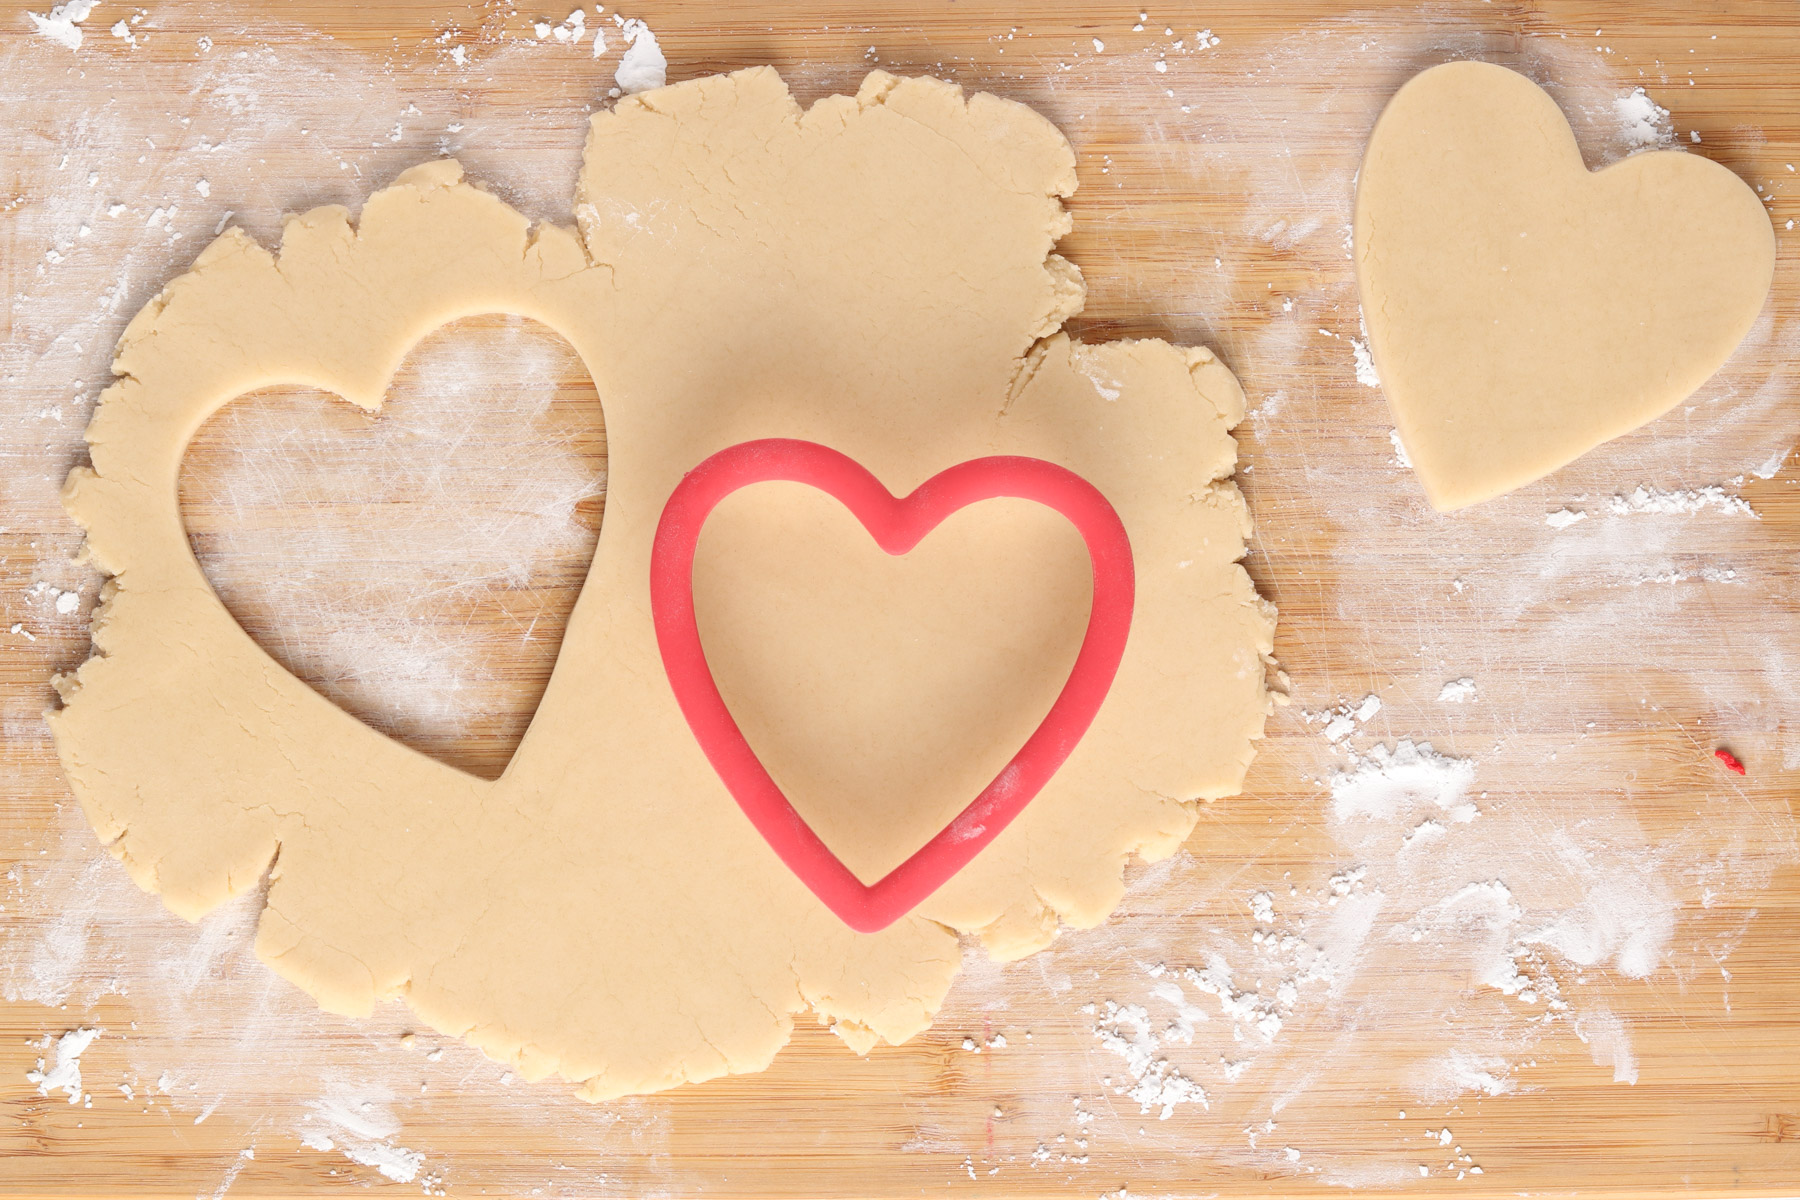
Step 4: Roll out your dough. Sprinkle a generous amount of powdered sugar onto a clean countertop. Remove half of your prepared dough and roll it out until it's about ¼" thick. If the dough sticks, rub a little powdered sugar on your rolling pin.
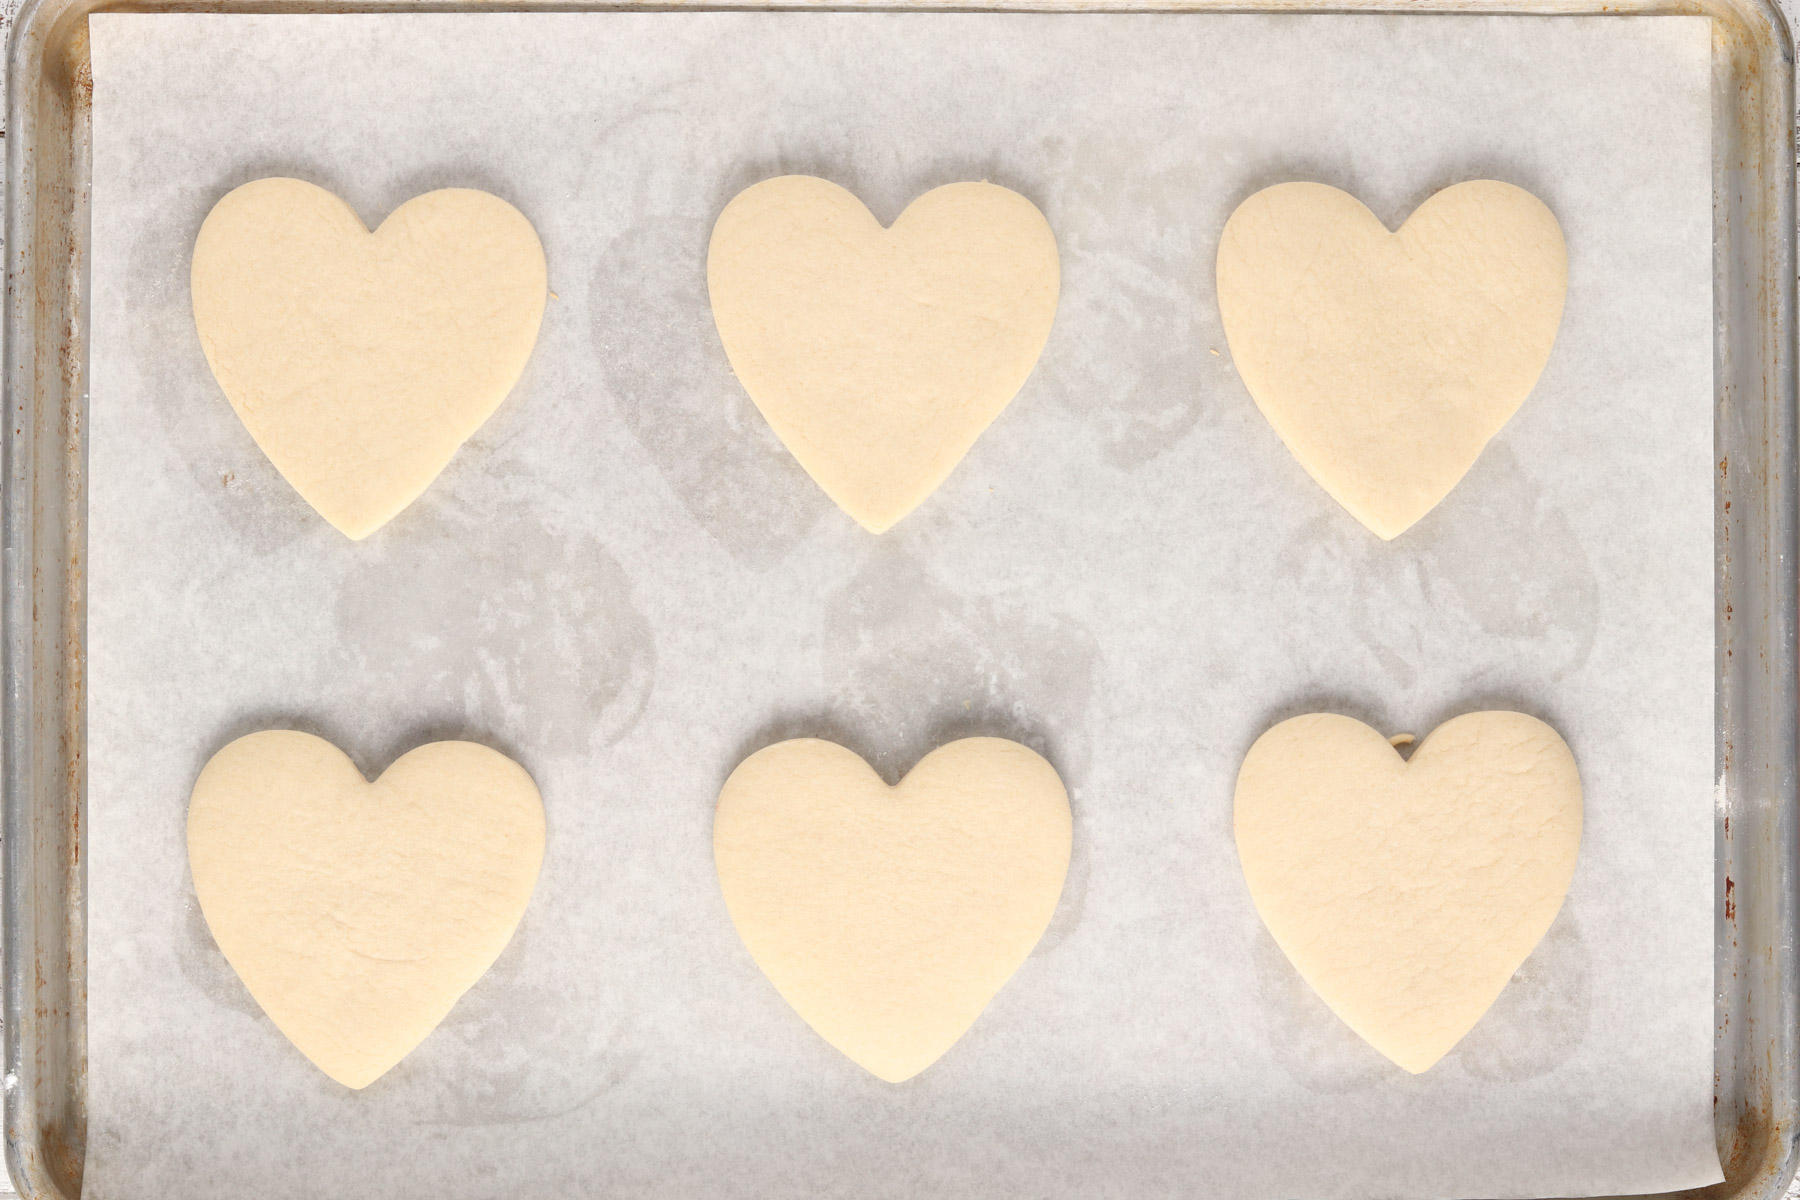
Step 5: Cut shapes from sugar cookie dough. Use cookie cutters to cut out shapes. Place the cutout cookies onto the prepared baking sheets (about 2" apart) using a spatula. Re-roll remaining dough and repeat this process until all dough has been used.

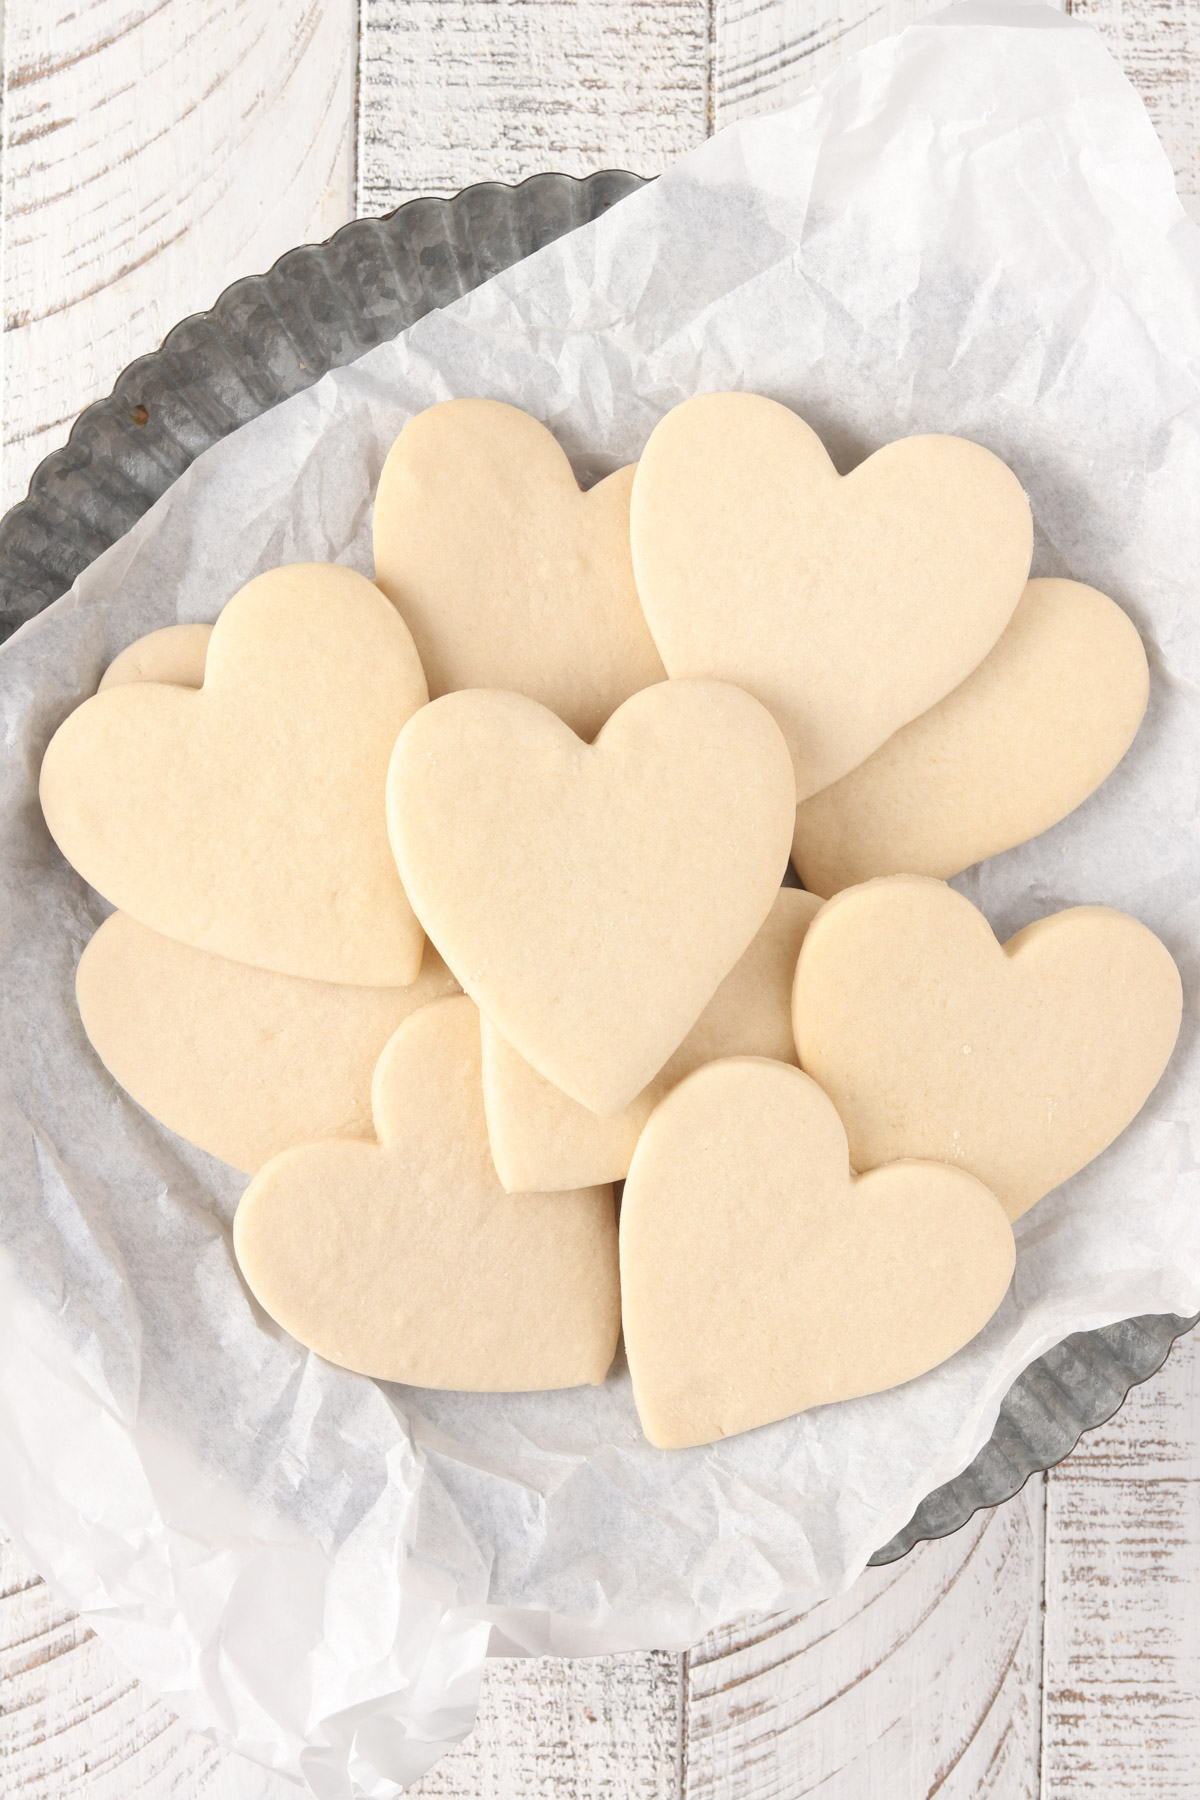
Step 6: Bake cookies. Bake time for these cookies is 9-12 minutes. Don't over-bake, these cookies will not turn golden brown at the edges. Let cookies rest on the baking sheet for about 10 minutes and then move them to a wire rack.
Hint: The trick to perfect cookies is making sure that your butter is at the correct temperature when you start the recipe. If too cold, it won't mix properly. If too warm, your cookies will spread and puff up. Butter should indent when pressed on lightly, but your finger should not be able to press all the way through.
Substitutions
- Gluten-free: I have made this recipe using Bob's Red Mill 1-1 Baking Flour (gluten-free). The cookies did not spread and looked very similar to the original recipe. The texture was a little chalky and the cookies slightly more likely to crumble when lifted from the cookie sheet. It definitely works, particularly if you are going to be adding icing. That said, for best results when making cut-out cookies I recommend using a recipe that was specifically written for a gluten free diet.
- Vanilla extract - can be subbed for almond extract for a fun flavor switch up.
Variations
Once your cookies are baked, decorating is the best part! I personally have tried all 3 methods below. Each is fantastic for it's own reasons. I recommend that over time, you give each a shot.

- Royal Icing - This type of icing dries hard which allows you to layer colors and make fancy designs. It typically has 3-4 ingredients, is simple to make. If you want a neat, beautiful design on your cookies OR want to be able to stack them .. this is the way to go. This is my go to royal icing recipe.
- Buttercream Icing - This type of icing is soft and tastes delicious. It is the most kid-friendly option as many children do not prefer royal icing. Choose a "crusting buttercream recipe" to ensure that the designs you pipe onto your cookies hold their shape. Use a piping bag fitted with a decorating tip for tons of creative options.
- Paint Your Own Cookies - A fantastic activity for kids. You will create white royal icing, dip the cookie and then have fun painting designs onto your cookies. Here is a tutorial with step-by-step pictures explaining how to do this activity.
Equipment
The following items I'm sharing are not affiliate links. I receive no compensation for sharing them.
Stand Mixer - This is the one that I use and love. It's a splurge. I got mine on sale. If you are looking for budget-friendly option, I used this one for years prior to purchasing my current model. If you don't have a stand mixer, you can still make this recipe. Just use a hand mixer fitted with 2 beaters.
Silicone Mats - these are my go to. I prefer using these in place of parchment paper. I find that the bottom of my cookies don't brown as easily.
Rolling Pin With Thickness Rings - this has been an absolute game changer in my baking. I do not make cookies without it. The thickness rings ensure that all the cookies are level and have a smooth top ready for decorating.
Food Scale - this is the one I use. It's inexpensive and hasn't let me down yet. Weighing the flour is REALLY important for this recipe.
Storage
Cookies are best kept fresh by refrigerating them until you are ready to decorate. Once fully cooled, stack cookies in an airtight container and place in the refrigerator. They can be stored for up to 5 days.
If you are pre-making your cookies and want to decorate them later, they freeze really well. Allow cookies to cool completely and then stack them into an airtight container or freezer bag. Cookies will stay fresh for up to months. To thaw, place frozen cookies onto the counter and allow them to come to room temperature.
Top Tip
Use powdered sugar to roll out your cooking dough. The powdered sugar will keep the dough from sticking to your work surface, just like flour, but the powdered sugar adds a sweetness and dissolves into the cookie when baked. Additionally, too much flour makes dry cookies.
FAQ: No Spread Sugar Cookies
This can happen if you don't measure the flour correctly. For this recipe it should be weighed using a food scale. If your dough is crumbly and doesn't come together when mixed, add 1 teaspoon of water at a time until a dough forms.
When the dough forms a ball on your paddle attachment it is ready. It should not be crumbly, nor should there be dough stuck to the edges or bottom of the mixing bowl.
Recipe

Best No Spread Sugar Cookies (No Chilling Required)
- Total Time: 25 minutes
- Yield: 18 cookies 1x
Description
These are THE BEST no chill, no spread sugar cookies. 7 basic ingredients, ready in 30 minutes and no chilling required! Just ultra thick, smooth, soft, classic cookies that can be customized for any event by using your favorite cookie-cutters.
Ingredients
- 1 cup butter ( 2 sticks), at cool room temperature*
- 1 ⅓ cup powdered sugar (165 grams), plus more for rolling dough
- 1 large egg
- 2 teaspoons pure vanilla extract
- 3 ½ cups all purpose flour (437 grams), scooped and leveled *
- 2 teaspoons baking powder
- ½ teaspoon salt
Instructions
-
Heat the oven to 375 degrees. Line 2 baking sheets with parchment paper or a silicone mat. Ensure butter and eggs are at a cool room temperature. *
- In the bowl of a stand mixer* fitted with a paddle attachment, add butter and powdered sugar. Mix until fluffy and light, about 2 minutes. Stop mixer, add egg and vanilla. Mix until incorporated. It will be chunky, that's ok!
- In a medium mixing bowl, combine flour, baking powder and salt. Whisk well. Add the flour mixture to the wet ingredients. Start mixing at a low speed, and work your way higher. Mix until just combined, do not over mix.
- Sprinkle a generous amount of powdered sugar onto a clean surface. Remove half of your prepared dough and roll it out until it's about ¼" thick. If the dough sticks, add a little powdered sugar to your rolling pin.
- Use cookie cutters to cut out shapes. Place the cutout cookies onto the prepared baking sheets about 2" apart. Re-roll remaining dough and repeat this process until all dough has been used.
- Bake cookies 9-12 minutes. If cookies turn golden brown, they are too done. Do not over bake.
- Let cookies cool on the baking sheet for 10 minutes and then move them to a wire cooling rack to cool completely.
- Decorate cookies using royal or buttercream icing, eat them warm, or store them for later use.
Notes
Butter should be a cool room temperature. This means that when you gently press, it will indent. If your finger falls to the middle or all the way through the butter it is too warm. Cool butter is what is required to ensure that these sugar cookies don't spread.
It is HIGHLY recommended that you weigh your flour. Using the scoop and level method can cause the amount of flour to vary 25g either direction. I find that when I use measuring cups, sometimes these cookies come out dry.
If your dough feels crumbly or won’t come together, try adding 1 teaspoon of milk or water at a time until the dough is cohesive. Avoid overmixing, as this can lead to tough cookies.
The amount of cookies will vary based on the size and shape of cookie cutters that you use.
- Prep Time: 15 minutes
- Cook Time: 10 minutes
- Category: Dessert
- Method: Baking
- Cuisine: American
Nutrition
- Serving Size: 1 cookie
- Calories: 225
- Sugar: 8.8 g
- Sodium: 70.7 mg
- Fat: 10.7 g
- Carbohydrates: 28.8 g
- Protein: 3.1 g
- Cholesterol: 37.4 mg
Recipes Like No Spread Sugar Cookies
- The BEST Recipe for Royal Icing Without Meringue Powder
- How To Make Paint Your Own Cookies (A PYO Tutorial)
- Soft Lemon Blueberry Cookies (Bakery Style Recipe)
- Sprinkle Filled Piñata Cupcakes
- Best Homemade Chocolate Popsicles (Easy Recipe)
- How To Make Rice Krispies Treats with Chocolate
- How To Make 4-Ingredient Cake Pops (Easy Recipe)
- Easy Chocolate Cake Trifle (Semi-Homemade Dessert)


Courtney
I don’t know what happened but I followed this recipe exactly. Made a double batch for last minute cookies. I usually use a chill recipe but just didn’t have the extra time. The dough was so dry and crumbly no amount of kneading would get it to where it had to be to roll out. I had to trash the entire double batch
Bailey Sissom
I’m so sorry to hear the recipe didn’t turn out for you—I know how frustrating that can be, especially with a double batch. I use this recipe often, so I’d love to help troubleshoot what might have gone wrong.
Dry, crumbly dough is usually caused by a few common issues. Over-measuring flour is the most frequent culprit, which can happen if it’s scooped directly from the bag. Weighing the flour (as the recipe suggests) or using the spoon-and-level method helps prevent this. Another factor could be butter that’s too cold or too warm—room temperature butter should be soft but not melted for the best consistency. Lastly, over-kneading the dough can actually make it drier and tougher. If the dough feels crumbly, a quick fix is to add a small amount of water or milk (about 1 teaspoon at a time) until it comes together. I’ll update the recipe notes with these tips to help prevent this issue in the future. Thank you for your feedback!
Diane
Haven’t made this yet but direction say to avoid using POWDERED sugar “because it contains cornstarch”. If you look at the sugar ingredients it shows that CONFECTIONERS sugar contains cornstarch. Powdered sugar does not! Is that a typo? Which should I use? Thanks!
Bailey Sissom
Hi Diane! I did some research following your comment and it seems I was mistaken. Either will work fine!
Emma K.
This is my new go-to cookie recipe. No chilling is a game changer. The cookies didn't spread at all and the dough consistency was very easy to work with.
Tamara L Johnson
Where has this recipe been all my life? I am 68 and now I can bake sugar cookies again! Absolutely no spread, no chilling, and my cutter was a fall leaf. I made most about 1/4 or 3mm and they only needed 7-8 min. Brushed with a little milk and used sprinkles. Perfection! Thank you!