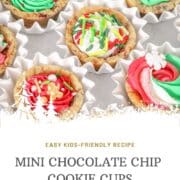
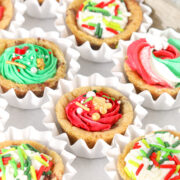
These chocolate chip mini cookie cups are soft, chewy bite-sized treats baked in a muffin pan, indented while warm, and filled with buttercream for a festive, bakery-style dessert that's perfect for parties, holidays and gift giving.

Made these for a holiday party and they disappeared before the cookie tray even hit the table. Truly foolproof and dangerously good.
- Kelly A.

Bailey's Thoughts ...
There are cookies you make once and then forget about. These are not those cookies. This recipe makes more than 60 mini cookie cups, so one round of baking can take care of dessert for multiple gatherings without any extra work. School parties, holiday get-togethers, cookie trays for friends. All handled.
You mix a simple chocolate chip cookie dough, scoop it into a silicone mini muffin pan, bake, and press the centers while warm, then fill with frosting and sprinkles. They freeze beautifully in a disposable bakery box and thaw tasting freshly baked.
For best results, chill your dough so the cups hold their shape and bake evenly. A silicone muffin pan makes them pop right out, and if they feel soft, freeze the pan for 30 minutes before removing. If you do not have piping bags, use a zip-top bag and snip the corner. This recipe is forgiving and low stress. You can make it ahead, freeze the baked cups, and decorate when you have time. They travel well too!
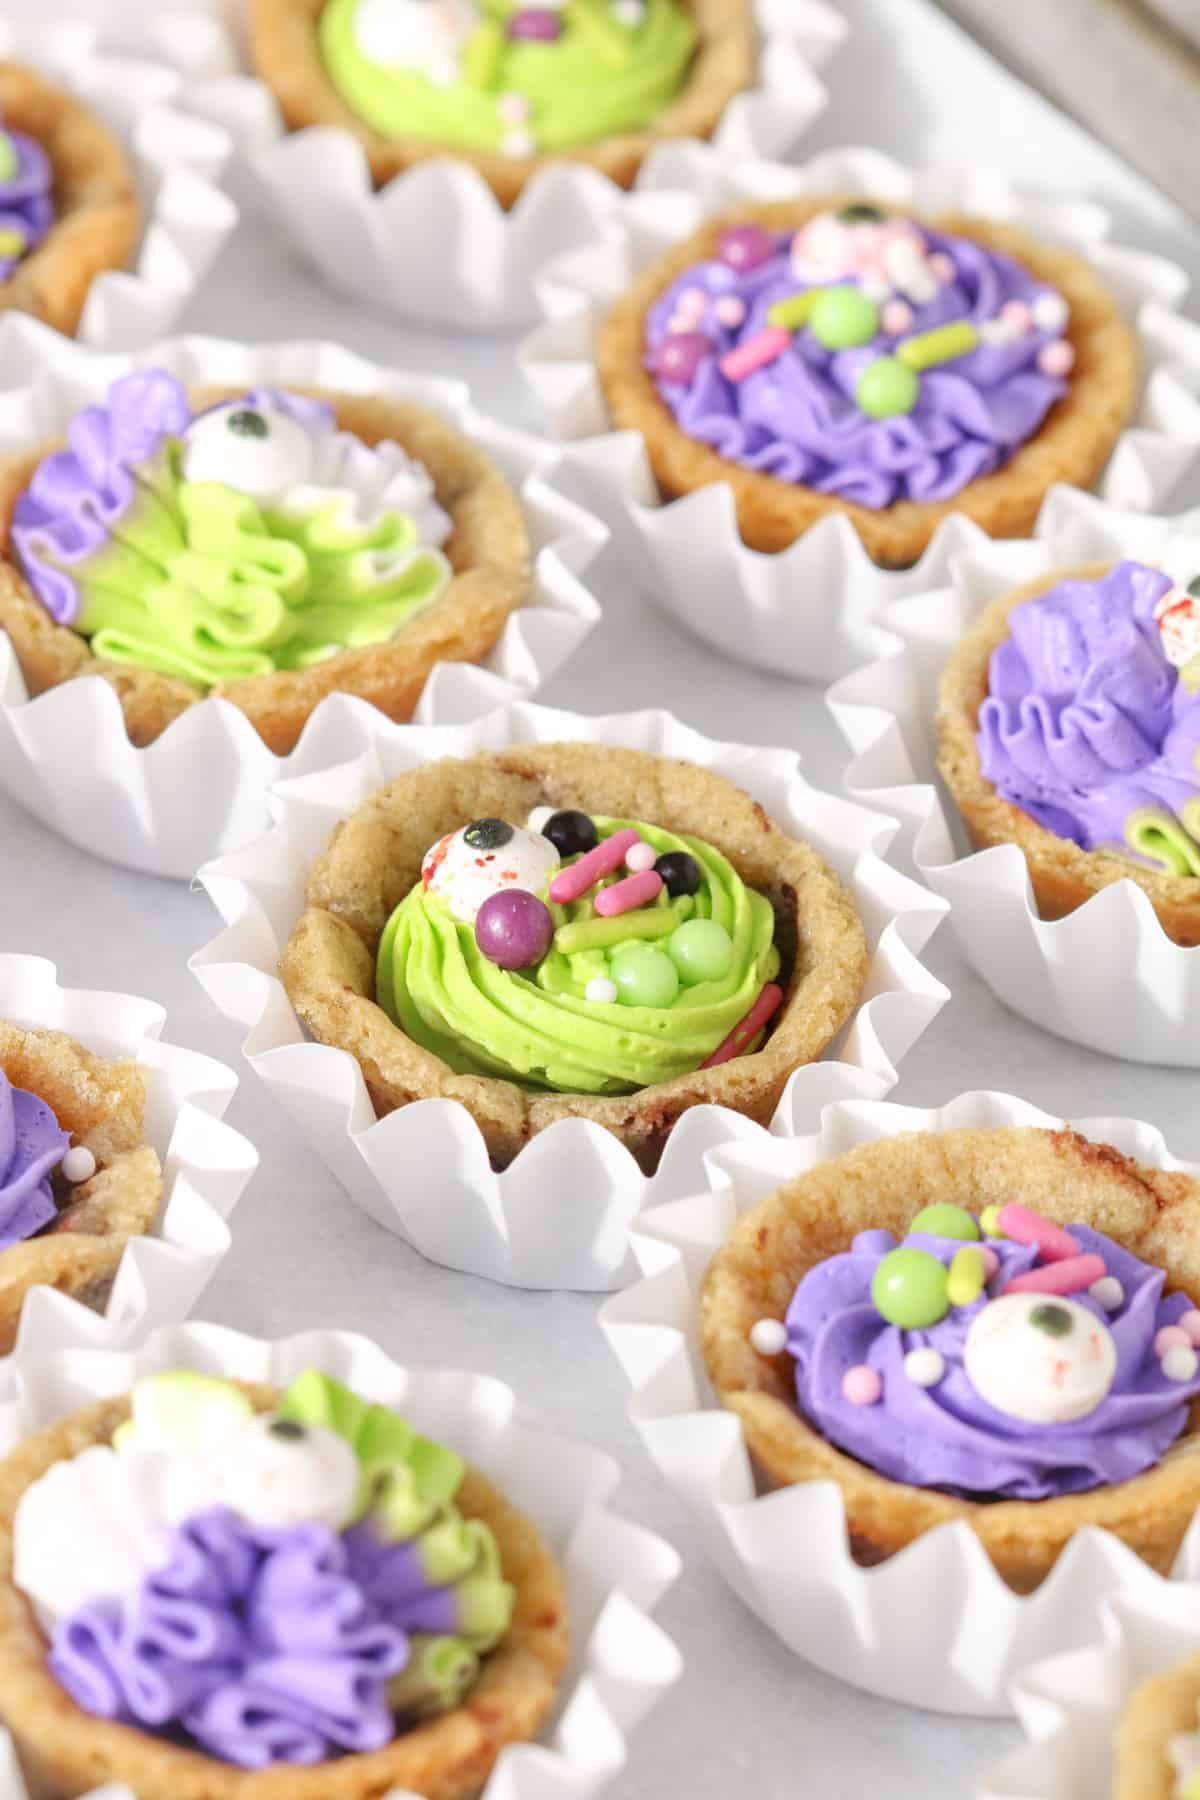
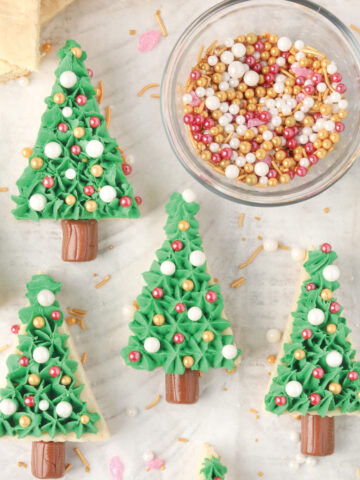
Choose a sprinkle mix you love, pick a few matching frosting colors and have fun with it. These look festive and creative without any special tools, and kids can jump in to decorate too.
-Bailey
P.S. Here is more inspiration with festive ideas for baking with kids.
Ingredients
Unsalted butter: Provides richness and moisture; choose sticks labeled "unsalted" so you can control the salt level.
Light brown sugar: Add sweetness and a soft, chewy texture thanks to its molasses content.
White sugar: Helps the cookies spread evenly and creates lightly crisp, golden edges.
Eggs: Bind the dough and provide structure so the cups hold their shape.
Vanilla extract: Enhances the flavor; choose pure vanilla extract for the best taste.
All-purpose flour: Gives the cookie dough structure and helps the cups bake up sturdy enough to fill.
Baking soda: Helps the cookies rise and bake evenly.
Salt: Balances the sweetness and enhances flavor.
Semi-sweet chocolate chips: Adds melty chocolate flavor in every bite.
Buttercream or frosting: Select colors that coordinate with your sprinkle mix for best results.
Sprinkles: Add color, texture and fun!
Instructions
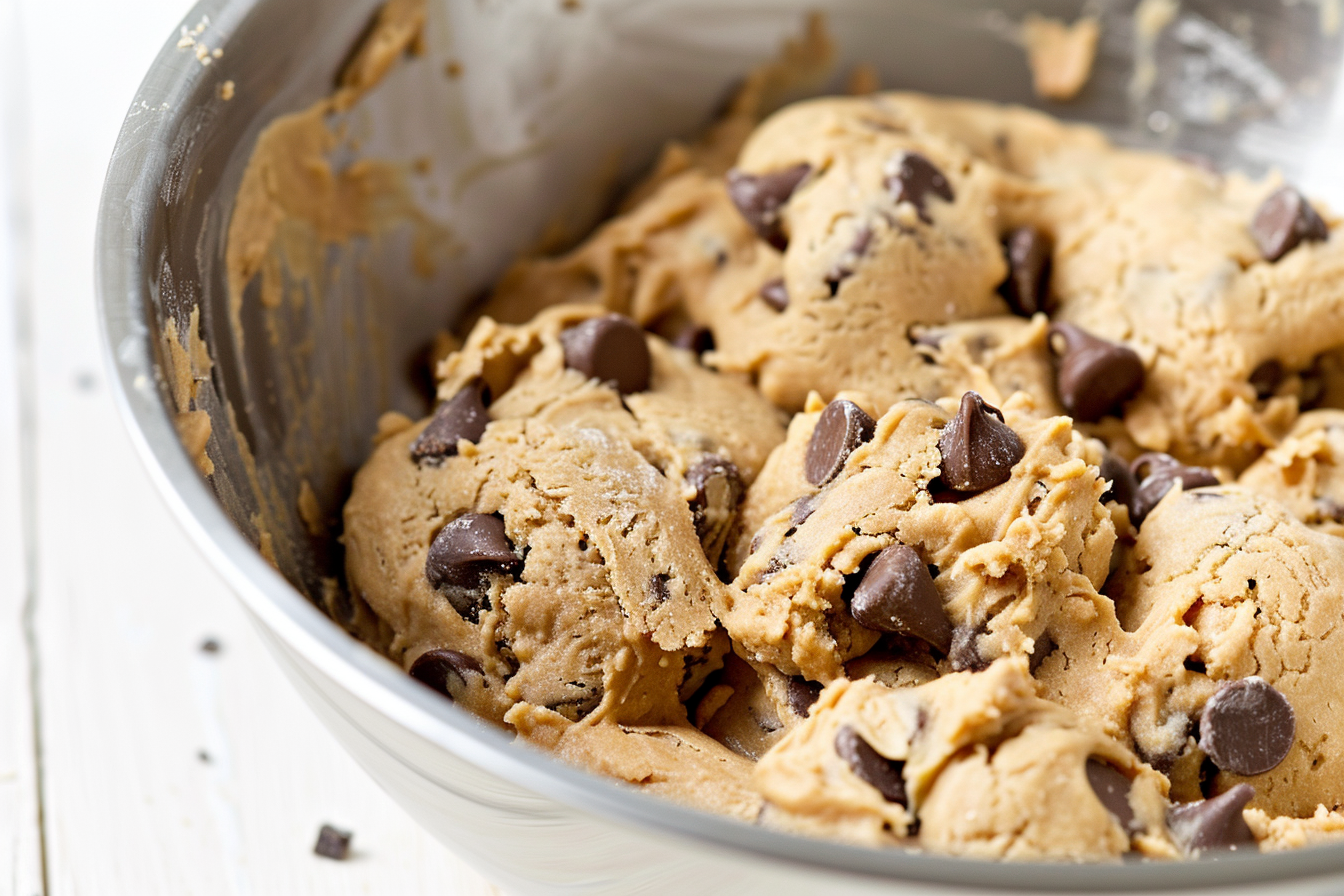
- Make the dough. Cream the butter and sugars until smooth, then mix the eggs and vanilla. Add the dry ingredients and mix just until combined, then stir in the chocolate chips.

- Roll into balls. Let the dough chill briefly, then scoop and roll into even balls. Place one ball into each cup of a silicone muffin pan.
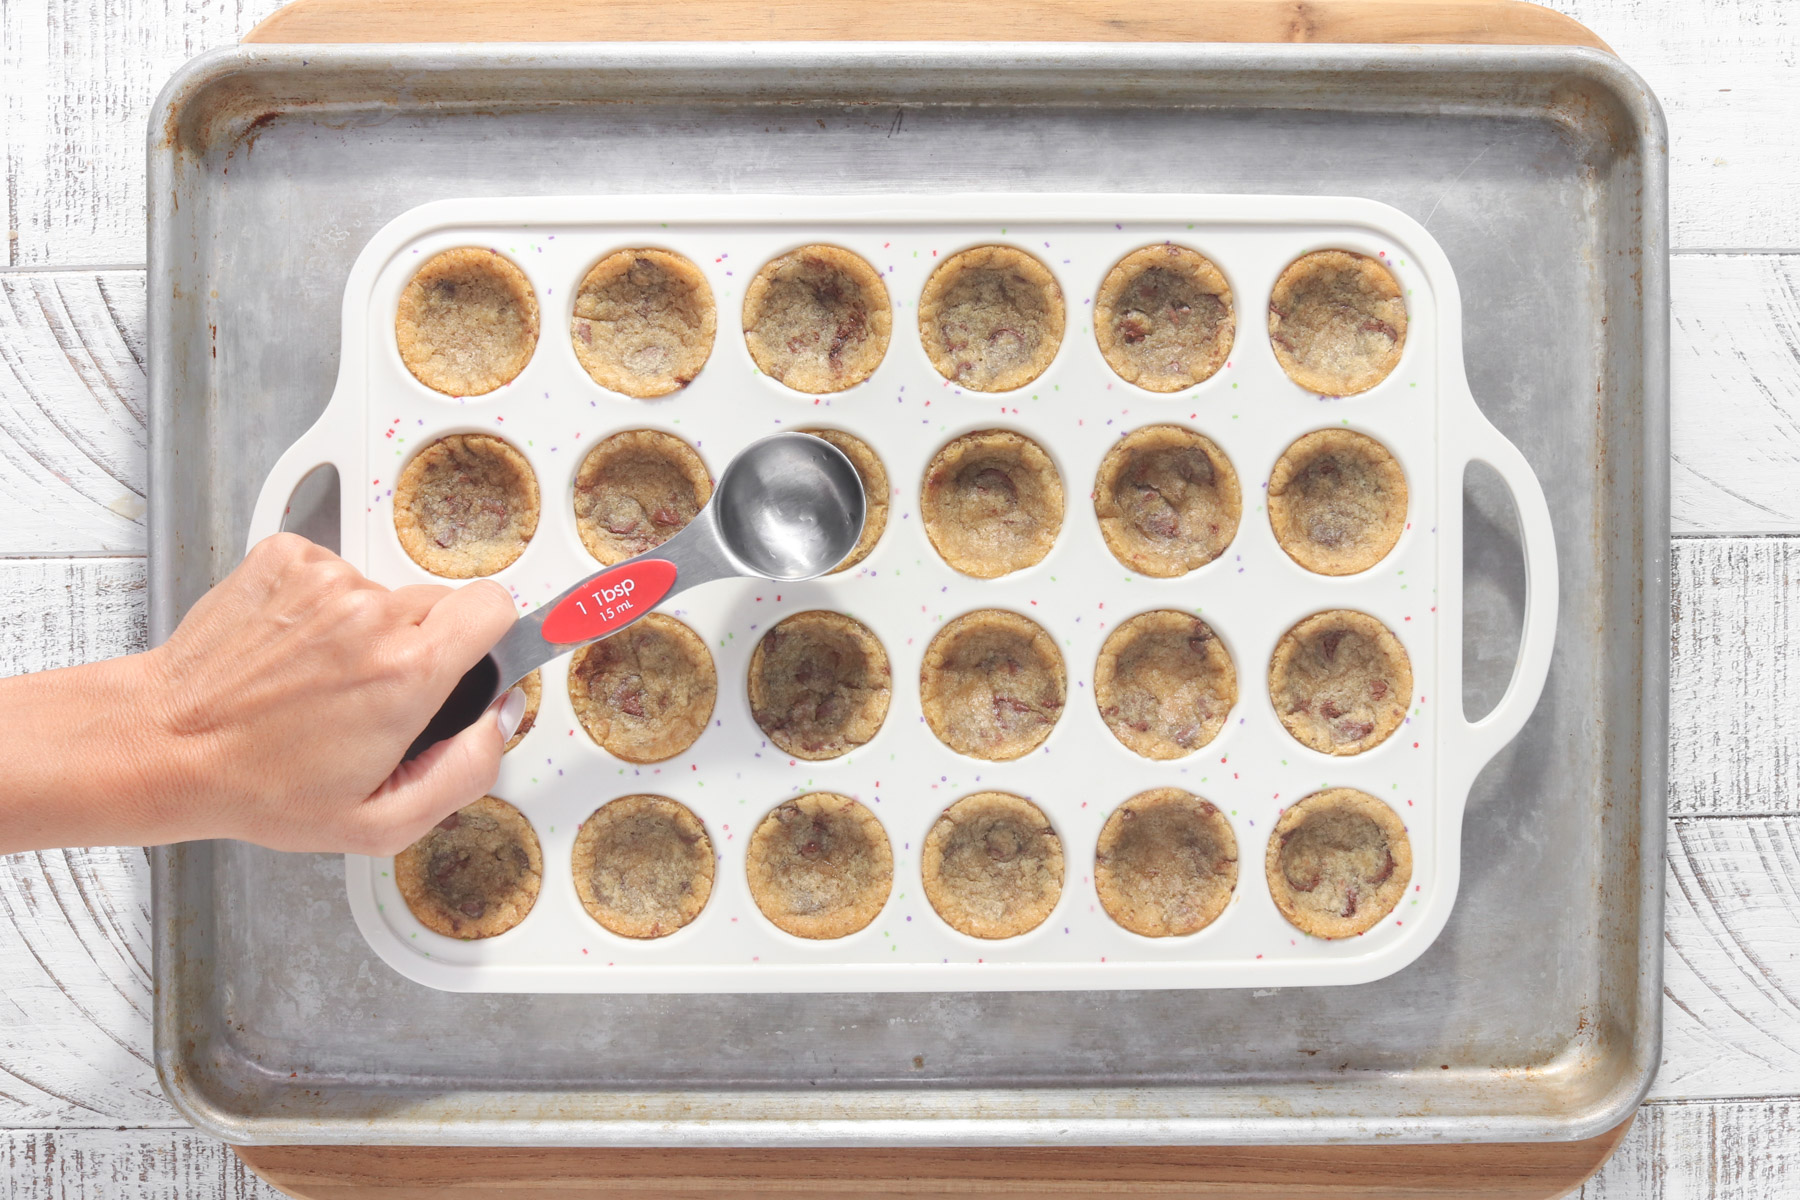
- Bake and press. Bake until the edges are set, then immediately use a round tablespoon to gently press the center of each cookie to form a cup. Let cool completely before removing from the pan.

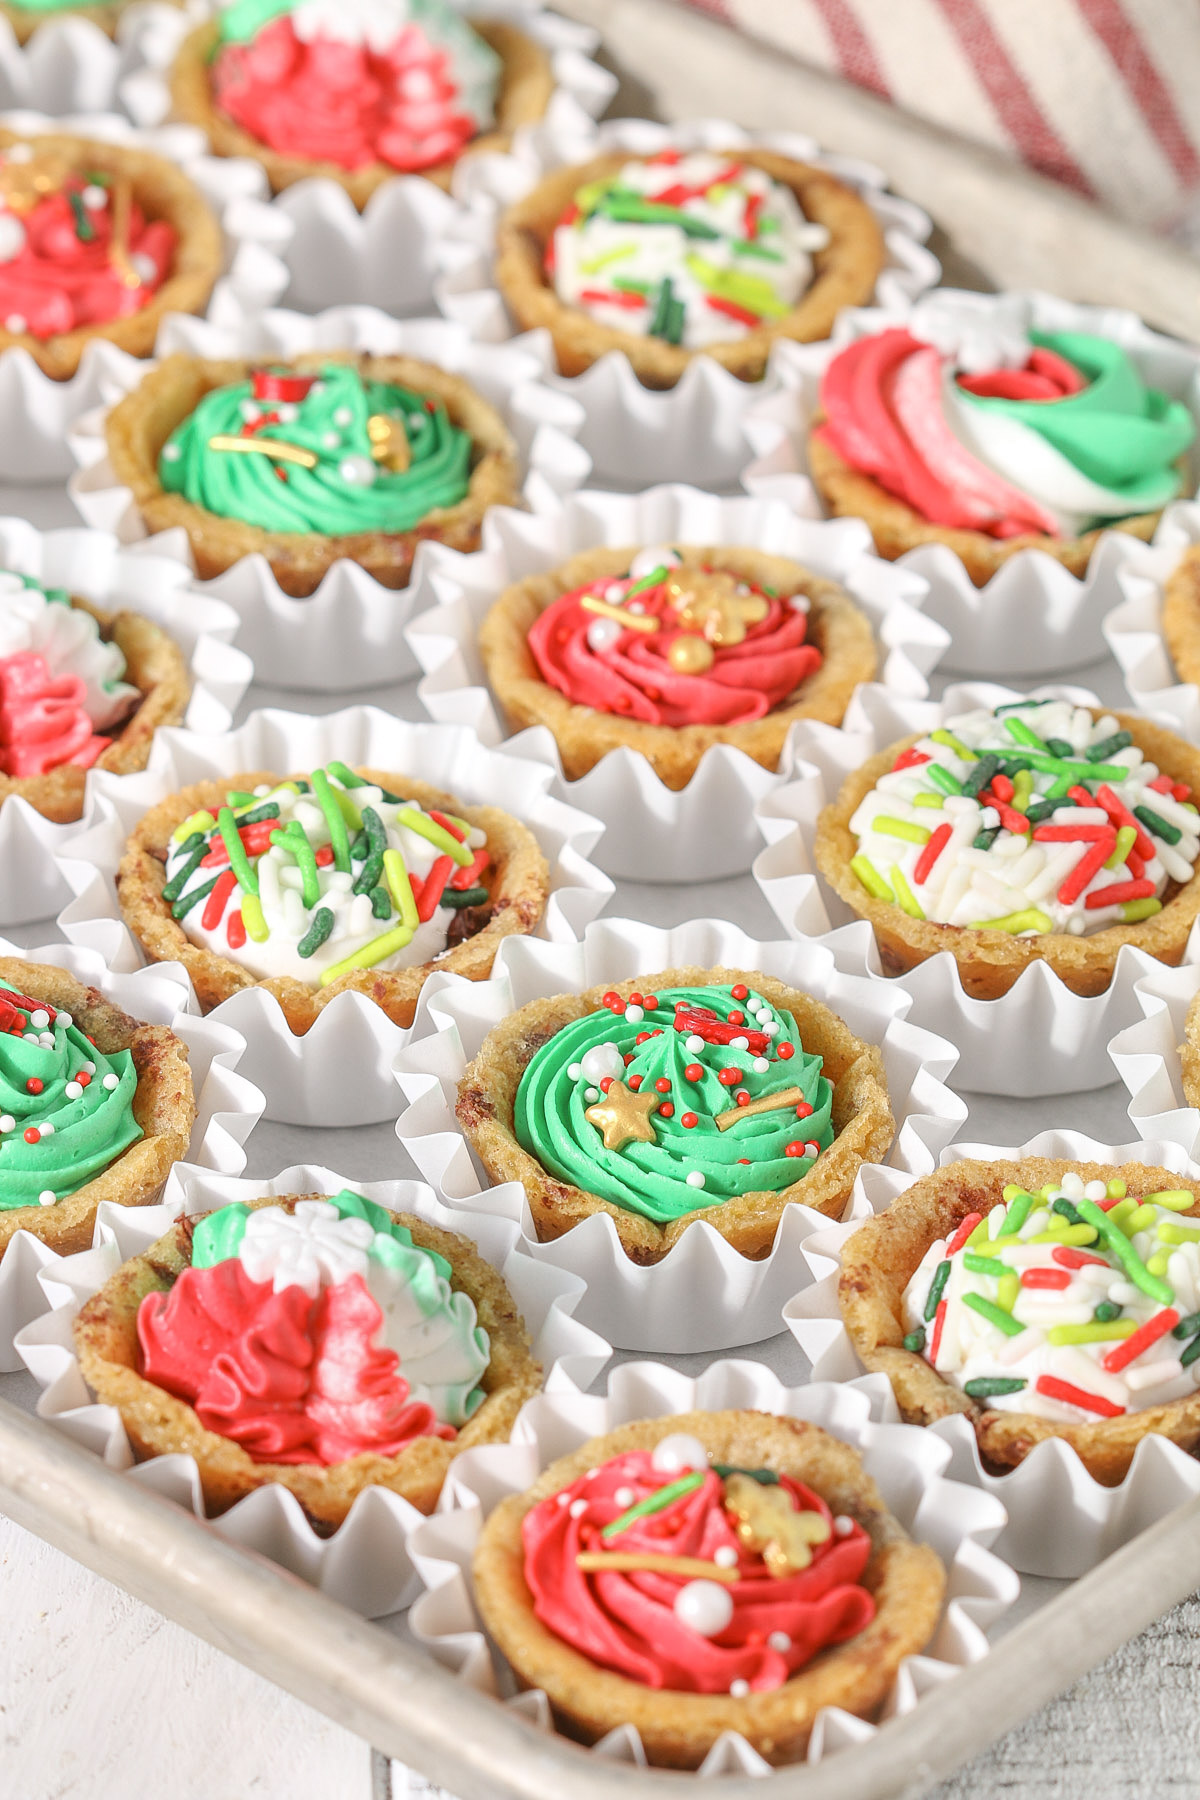
- Decorate. Pipe frosting into each cookie cup and finish with sprinkles. Store as directed until ready to serve.
Top Tip
Aim for 18–19 grams per dough ball. Using a scale keeps every cookie cup the same size and ensures even baking.
Variations
I come back to these cookie cups for every holiday because they are so easy to customize. Same base recipe, new colors and sprinkles. Below are the versions I've made so far, and I'll continue updating this section as new celebrations roll around.
Halloween Cookie Cups:
Christmas Cookie Cups:
Storage
Refrigerate: Store cookie cups in an airtight container in the fridge for up to 5 days. If they're frosted, place in a single layer.
Freeze: Freeze baked, frosted or unfrosted cookie cups for up to 3 months.
Equipment
Mini muffin silicone pan: Makes it easy to release the cookie cups cleanly.
Kitchen scale: Ensures consistent dough ball size and even baking. Measuring spoons and a cookie scoop work, but a scale will give the best results.
Piping bags and tips: Use 12-inch piping bags with a Wilton 1M tip for large swirls or a Wilton #32 for smaller swirls. A zip-top bag with the corner snipped also works.
Paper ruffle liners: For serving only. Not for baking. Add the baked cookie cups to these after cooling for a clean, pretty presentation.
Some of the products linked here are affiliate links, which means i earn a small commission at no extra cost to you. I only shares tools I personally use and love.
FAQ
No, Paper liners wrinkle and stick to the dough as it bakes. Bake in a silicone mini muffin pan, then place finished cookie cups in paper liners for serving if you like that look.
Yes. Chilling helps the dough hold its shape and prevents spreading, which is key for forming the cookie cup.
American buttercream pipes well and holds its shape. Store-bought frosting works too, chill it slightly if it feels too soft to pipe.
Related
Looking for other recipes like this? Try these:

Pairing
Chocolate chip mini cookie cups pair well with these recipes.


Recipe
Chocolate Chip Mini Cookie Cups (With Buttercream Frosting)
- Total Time: 0 hours
- Yield: ~65 mini cookie cups
Description
These chocolate chip mini cookie cups are soft, chewy bite-sized treats baked in a muffin pan, indented while warm, and filled with buttercream for a festive, bakery-style dessert that's perfect for parties, holidays and gift giving.
Ingredients
- unsalted butter (2 sticks | 226g, softened)
- light brown sugar (¾ cup | 150g)
- white sugar (¾ cup | 150g)
- large eggs (2 | room temp)
- vanilla extract (1 teaspoon | 5mL)
- all-purpose flour (2½ cups | 350g)
- baking soda (1 teaspoon | 5g)
- salt (1 teaspoon | 5g)
- semi-sweet chocolate chips (2 cups | 320g)
- homemade buttercream or store-bought icing ( ~ 4 cups | ~940g)
- sprinkles (optional)
Instructions
- Preheat the oven to 350°F (176°C) and place a silicone mini muffin pan on a baking sheet for support.
- In a mixing bowl, cream unsalted butter (2 sticks), light brown sugar (¾ cup), and white sugar (¾ cup) until light and fluffy, 1–2 minutes, scraping the bowl as needed.
- Add large eggs (2) and vanilla extract (1 tsp) and mix until smooth and creamy, scraping the bowl halfway through.
- Add all-purpose flour (2½ cups), baking soda (1 tsp), and salt (1 tsp) and mix just until combined. Do not overmix. Stir in semi-sweet chocolate chips (2 cups).
- Refrigerate dough for 10–15 minutes to firm slightly and make rolling easier.
- Roll dough into 18–19g balls (about 1 heaping tablespoon each). Place one dough ball into each well of a silicone mini muffin pan.
- Chill dough in the pan for 30 minutes before baking to help cookie cups hold their shape.
- Bake 9–11 minutes or until edges are lightly golden and centers still look soft.
- Immediately press the center of each baked cookie with a tablespoon to form a cup shape. Cool completely in the pan.
- Optional but helpful: Once cooled to room temp, freeze the pan for 10–15 minutes, then gently pop the cookie cups out of the silicone mold.
- Pipe buttercream or frosting (about 1 tablespoon per cookie) into each cookie cup using a piping bag fitted with a 1M or small closed-star BLANK tip, then top with sprinkles (as desired).
Notes
No piping bag? No problem! Fill a zip-top bag with buttercream, push the frosting toward one corner, and snip the tip. It won't create a bakery-styled swirl, but it pipes beautifully and will still taste amazing. Finish with sprinkles for a fun festive look.
Use a silicone mini muffin pan for this recipe. Any other method may result in the cookie cups sticking to the pan.
- Prep Time: 30 minutes + chill time
- Cook Time: 9-11 minutes per batch
- Category: Dessert
- Method: Baking
- Cuisine: American
Nutrition
- Serving Size: 1 mini cookie cups
- Calories: 148
- Sugar: 16.5 g
- Sodium: 84.4 mg
- Fat: 6.8 g
- Carbohydrates: 21.3 g
- Protein: 1.1 g
- Cholesterol: 13.2 mg


Comments
No Comments