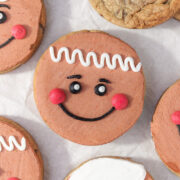
These mini cookie cakes are thick, soft chocolate chip cookies baked in silicone molds and topped with buttercream for easy decorating. Ideal for holiday designs, gifting, or any time you want a fun, individual-size cookie cake.

I never decorate cookies because I’m terrible at it, but these were actually doable and turned out so cute.
- Sarah H.
Jump to:

Bailey's Thoughts ...
There are gorgeous cookies all over the internet right now, but most of them require a level of skill I don't have and don't want to pretend to have. I wanted something cute enough for parties or gifts, impressive enough to feel special, and still realistic for someone who isn't a professional baker. These mini cookie cakes deliver. They look adorable and they are genuinely achievable. Promise.
The base is a soft, sturdy chocolate chip cookie that bakes evenly inside the silicone mold and creates a tidy, uniform edge. Once it is pressed into the buttercream and frozen, you flip it over and get a smooth canvas ready for a gingerbread face or any other design you want to try.
The silicone molds are nonnegotiable. They give you the perfect shape with zero effort. Weigh the dough. An extra five to ten grams can push the cookie above the rim of the mold. If that happens (and it might), use the back of a spoon and gently press the cookie back into the mold as soon as it comes out of the oven. The same spoon works to nudge down any uneven spots on top.
-Bailey
P.S. - If you love the idea of cute holiday desserts without stress, check out my "baking with kids" recipes. Adorable and approachable recipes all in one spot.
Cookie Ingredients

Unsalted butter: Standard unsalted butter gives you consistent flavor and helps the dough cream properly.
Light brown sugar: Look for soft, fresh brown sugar that still clumps slightly in the bag.
White sugar: Standard granulated sugar is perfect and helps the cookies bake evenly.
Large eggs: Use eggs labeled “large” to keep the dough structure consistent.
Vanilla extract: Pure vanilla gives the best flavor.
All-purpose flour: Regular all-purpose flour creates the right balance of structure and softness.
Baking soda: Provides lift and helps the cookies spread correctly.
Salt: Enhances the flavor of the dough.
Semi-sweet chocolate chips: Use a familiar brand from the baking aisle for predictable melting and taste.
See recipe card for quantities.
Gingerbread Man Decorating Supplies
Silicone Cookie Cake Mold: This is the exact mold that I used to make the cookie cakes.
Homemade buttercream: I use Sally’s Baking Addiction vanilla buttercream because it pipes smoothly and freezes beautifully. I made a double batch for this project and was able to decorate all 12 cookies, with extras left over to freeze.
Gel Food Coloring: Americolor Super Black , Americolor Super Red, Americolor Espresso
Piping Bags: I used both 18" bags (brown butter cream) and smaller 12" bags (red, white and black).
Brown Piping Tip: You can skip the tip and simply snip the end of your piping bag about ¾ - 1 inch from the bottom of your piping bag.
White Piping Tip: Wilton #5 creates the smooth, even hair squiggle shown in the photos.
Red Piping Tip: Wilton #10 is the perfect size for the rounded cheeks.
Black Piping Tip: Wilton #3 works for all the black details including the smile, eyes, and eyebrows.
Parchment Paper: Use parchment that is completely smooth because every crease will transfer onto the surface of the icing. I recommend using a roll rather than the pre-cut sheets from a box so you can pull a perfectly flat piece every time.
Instructions
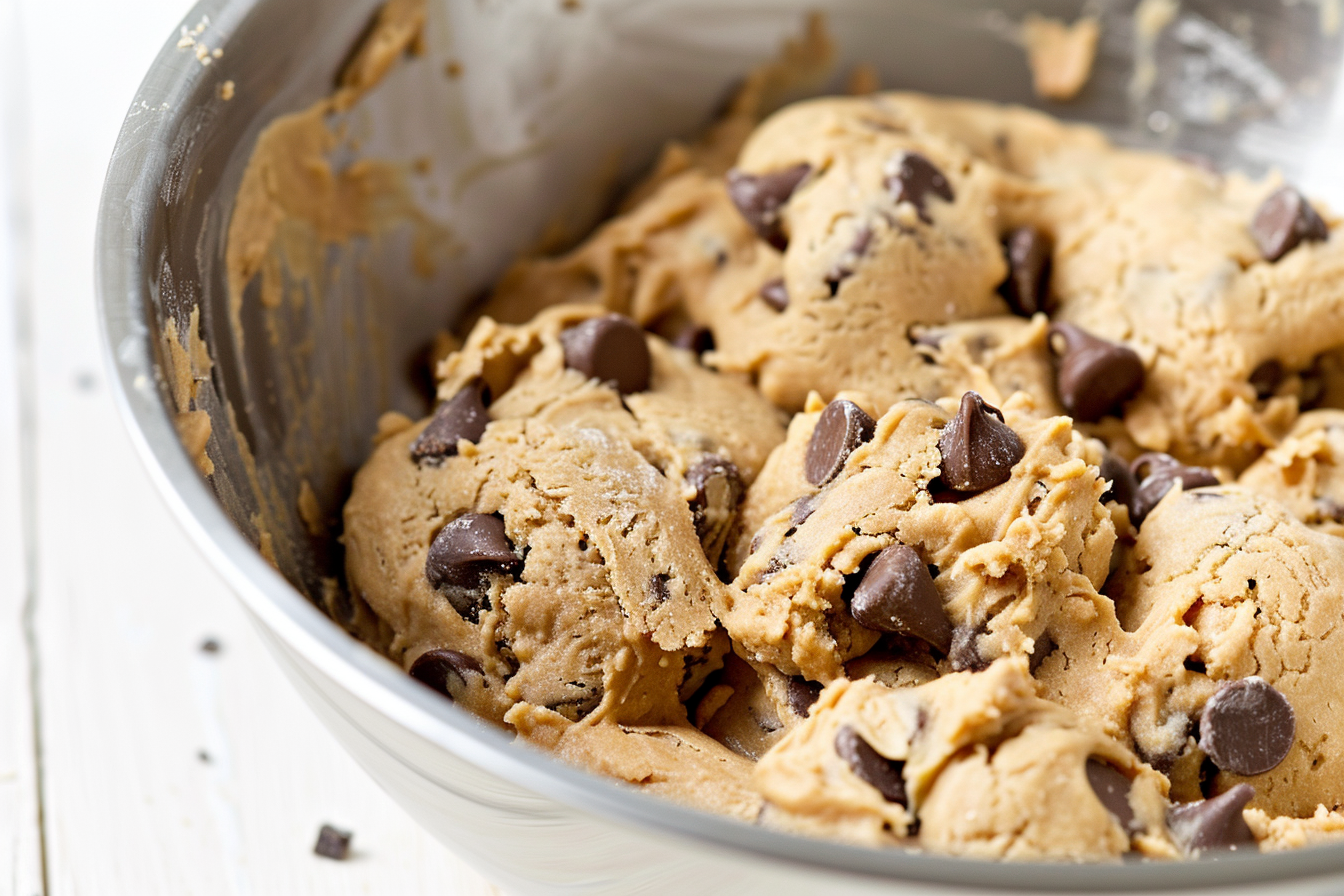
- Make the cookie dough. Cream the butter and sugars until light and smooth, then mix in the eggs and vanilla. Add the dry ingredients and stir until dough forms. Fold in the chocolate chips and chill briefly.

- Fill the silicone molds and bake. Roll the dough into even portions and place one portion into each well of the silicone mold. Press gently to settle the dough and bake until the cookies are set and lightly golden around the edges.

- Add the buttercream and flatten. Pipe buttercream onto the center of each cooled cookie, then flip the cookie onto a smooth sheet of parchment. Press firmly until the frosting spreads to the edges. Freeze the cookies until the buttercream is fully solid.

- Flip and decorate. Remove the cookies from the freezer and flip them upright so the buttercream is on top. Pipe the gingerbread man features or any design that you prefer.
Top Tips
- Weigh each dough portion carefully; even five extra grams can push the cookie above the rim of the mold.
- Use perfectly smooth parchment when flattening the buttercream, since any crease will imprint onto the frosting surface.
- Remove the cookie cakes from the silicone molds only after they are fully cool, freeze briefly if you need a cleaner release.
- Press the warm cookies gently back into the mold with the back of a spoon if they rise above the edge during baking.
Storage
Refrigerate: Store decorated cookie cakes in a single layer in an airtight container for up to 5 days. Keep the container sealed to prevent the buttercream from drying out.
Freeze: These cookie cakes freeze well. Place them in a single layer on a baking sheet and freeze until solid, then transfer to an airtight, freezer-safe container. Freeze for up to 2 months. Thaw in the refrigerator to maintain the smooth surface of the buttercream.
FAQ
This method works best with homemade buttercream. Store-bought icing remains too soft, even when frozen, and does not always release cleanly from the parchment paper.
Yes. Snip the end of the piping bag to create ample shapes or use small storage bags with a tiny corner cut for details.
Yes. You can fully assemble and freeze them for up to 2 months, or refrigerate them for 5 days.
Related
Looking for other recipes like this? Try these:

Pairing
These are my favorite dishes to serve with Mini Cookie cakes:


Recipe
Gingerbread Man Mini Cookie Cakes with Silicone Molds
- Total Time: 0 hours
- Yield: 12 mini cookie cakes 1x
Description
These mini cookie cakes bake up thick, soft, and perfectly golden with plenty of chocolate chips and a smooth buttercream layer that’s ideal for decorating.
Ingredients
unsalted butter (2 sticks | 226g, softened)
light brown sugar (¾ cup | 150g)
white sugar (¾ cup | 150g)
large eggs (2 | room temp)
vanilla extract (1 tsp)
all-purpose flour (2½ cups | 350g)
baking soda (1 tsp)
salt (1 tsp)
semi-sweet chocolate chips (2 cups | 320g)
homemade buttercream (~4 -5 cups)
gel food coloring (as needed | any colors you like)
Instructions
- Preheat the oven to 350°F and place your silicone mold on a baking sheet for support.
- Cream unsalted butter (2 sticks), light brown sugar (¾ cup), and white sugar (¾ cup) for 1–2 minutes until light and fluffy, scraping the bowl as needed.
- Mix in large eggs (2) and vanilla extract (1 tsp) until smooth and creamy, scraping the bowl halfway through.
- In a separate bowl, whisk together the all-purpose flour (2½ cups), baking soda (1 tsp), and salt (1 tsp). Add the dry ingredients to the wet ingredients and mix just until combined. Stir in semi-sweet chocolate chips (2 cups).
- Refrigerate the cookie dough for 10–15 minutes to help reduce spreading.
- Roll the dough into 95g portions and place one dough ball into each well of the silicone mold.
- Bake 15–18 minutes or until the edges are turning golden brown.
- Let the cookie cakes cool completely in the silicone mold. Overnight is ideal. Once they are fully cooled, carefully pop each cookie cake out of the mold. If any are sticking, place the mold in the freezer for 10 to 15 minutes and try again.
- Tint the buttercream with your preferred gel food coloring and load it into piping bags. Check the notes section for the exact piping tips I used to create the gingerbread man design featured in this post.
- Pipe buttercream (¼ - ⅓ cup) into the center of each cookie. Flip each cookie upside down and press firmly onto a parchment-lined sheet until the frosting reaches the edges. Freeze overnight.
- Remove the cookie cakes from the freezer and immediately flip them upright. The buttercream will be firm and ready for decorating, so go ahead and add your preferred colors and designs.
Decorating Instructions: (Optional)
Use black, red, and white buttercream to create the gingerbread man face:
-
Hair: Pipe a loose white squiggle across the top edge of the cookie.
-
Eyes: Pipe two small black dots, then add tiny white dots on top for the highlights.
-
Brows: Add two thin black curved lines above the eyes.
-
Cheeks: Pipe two medium red dots on either side of the face.
-
Smile: Use black buttercream to pipe a simple curved smile connecting the cheeks.
Tip: Keep the piping bags fitted with small round tips for clean lines and better control.
Notes
Silicone Cookie Cake Mold: This is the exact mold that I used to make the cookie cakes.
Homemade buttercream: I use Sally’s Baking Addiction vanilla buttercream because it pipes smoothly and freezes beautifully. I made a double batch for this project and was able to decorate all 12 cookies, with extras left over to freeze.
For the gingerbread man face:
Gel Food Coloring: Americolor Super Black , Americolor Super Red, Americolor Espresso
Piping Bags: I used both 18" bags (brown butter cream) and smaller 12" bags (red, white and black).
Brown Piping Tip: You can skip the tip and simply snip the end of your piping bag about ¾ - 1 inch from the bottom of your piping bag.
White Piping Tip: Wilton #5 creates the smooth, even hair squiggle shown in the photos.
Red Piping Tip: Wilton #10 is the perfect size for the rounded cheeks.
Black Piping Tip: Wilton #3 works for all the black details including the smile, eyes, and eyebrows.
- Prep Time: 20 minutes
- Cook Time: 15-18 minutes
- Category: Dessert
- Method: Baking
- Cuisine: American
Nutrition
- Serving Size: 1 mini cookie cake (buttercream not included)
- Calories: 525
- Sugar: 46.1 g
- Sodium: 316.8 mg
- Fat: 27 g
- Carbohydrates: 68.7 g
- Protein: 6.6 g
- Cholesterol: 71.5 mg


Comments
No Comments